


Backlight Out On Your TV? Try This Before You Replace The LED's!
If an entire quadrant of the LED backlight on your TV has gone out, it's possible that you have a driver board failure and not burned out LED's. Look for a uniform outage, not sporadic dimming or a single dim line (suggesting LED individual lights or entire LED strip failure). If your outage looks similar to mine, taking up 1/4 of your screen, try replacing your LED driver board.
This video is not sponsored. I purchased the LED Driver Panel on my own and have no affiliation with the manufacturer. Here’s everything you’ll need:
Vizio 65 inch LED TV: M65-D0
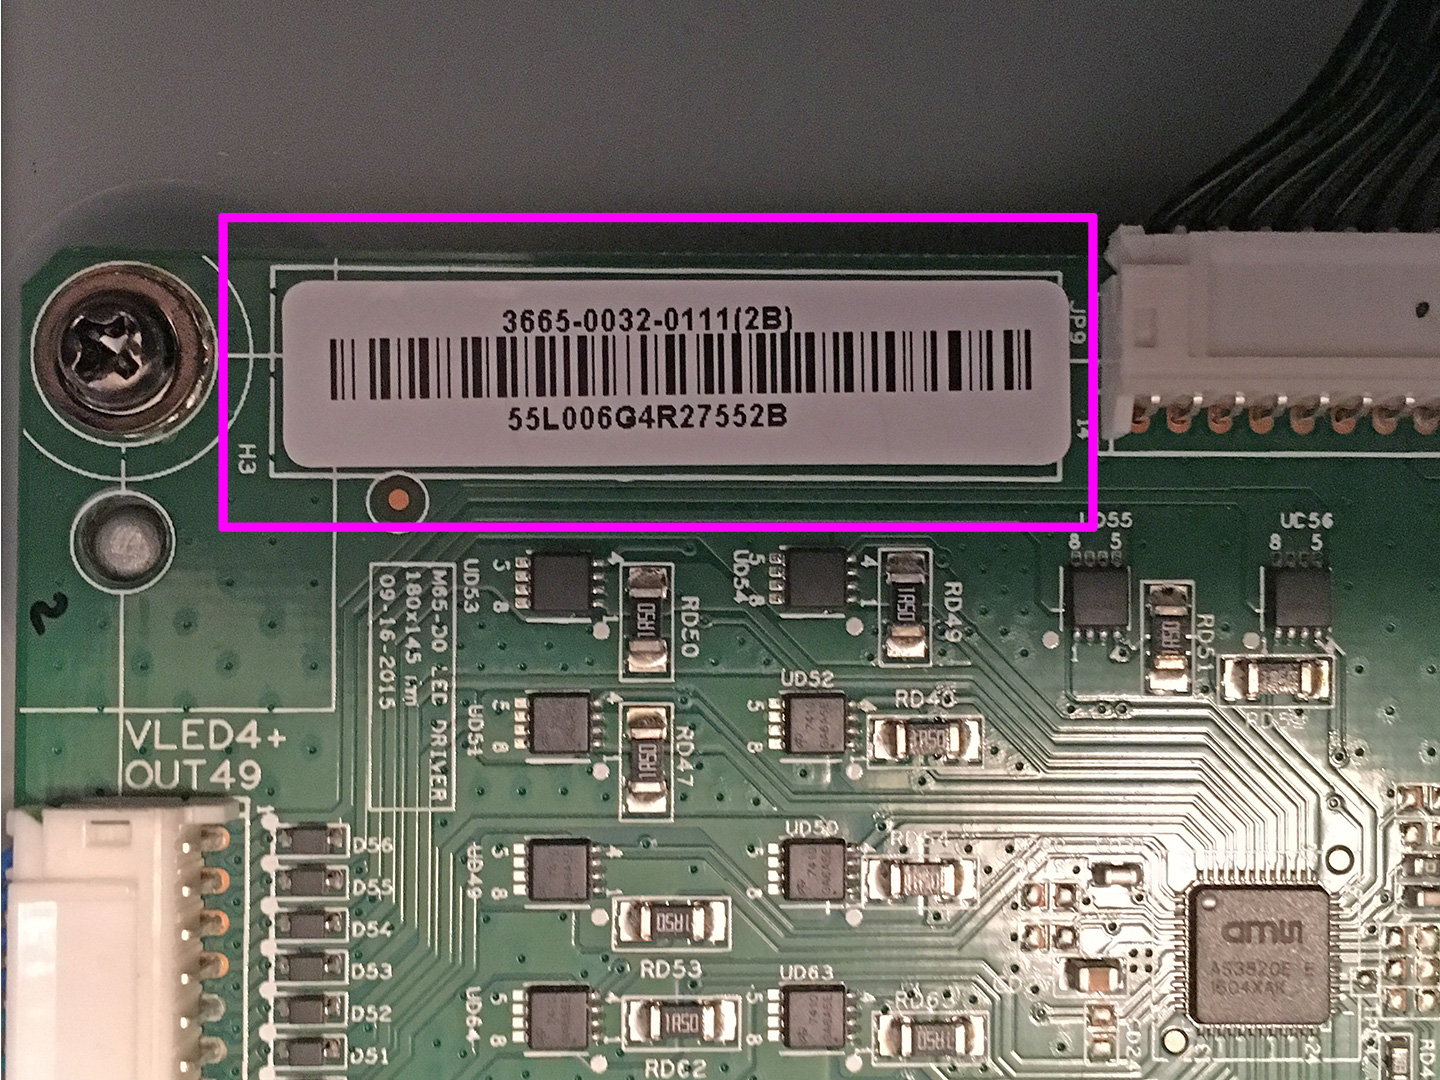
LED Driver Board Part Number: 3665-0032-0111(2B)
Transcript
Backlights out on your TV? It might not be burned out LEDs, and could be a much easier, much less time consuming, and much less expensive video board fix. Take it from me—I learned the hard way and stripped the entire TV down to its LED backlights and realized that wasn’t issue. Here’s what to look for:
If it appears that an entire quadrant of your TV is out. Meaning, one forth of the TV—in my case the entire lower left quadrant had no working LED backing lights. As you can tell, it’s the whole section, and the outage is uniform. If one or two LEDs are burned out, the dimming will look sporadic and uneven. Even if an entire LED strip goes out, that will show up as a single dim line. As you can see in my case, the uniformity of the entire quadrant should have tipped me off.
If this is what is happening to your TV—and while researching how to fix this I came across several people who own the Vizio UM-65D0 experiencing this similar problem—stop here! Check the video board first. Don’t just assume it’s an outage of the LED backlights.
Let’s start by dismantling the back panel. Simply unscrew every screw that you see. There’s a few of them and it won’t come apart until you get them all. The back plastic panel pops off. Sometimes it’s easier to start from the edges and work those loose, then it just lifts straight off.
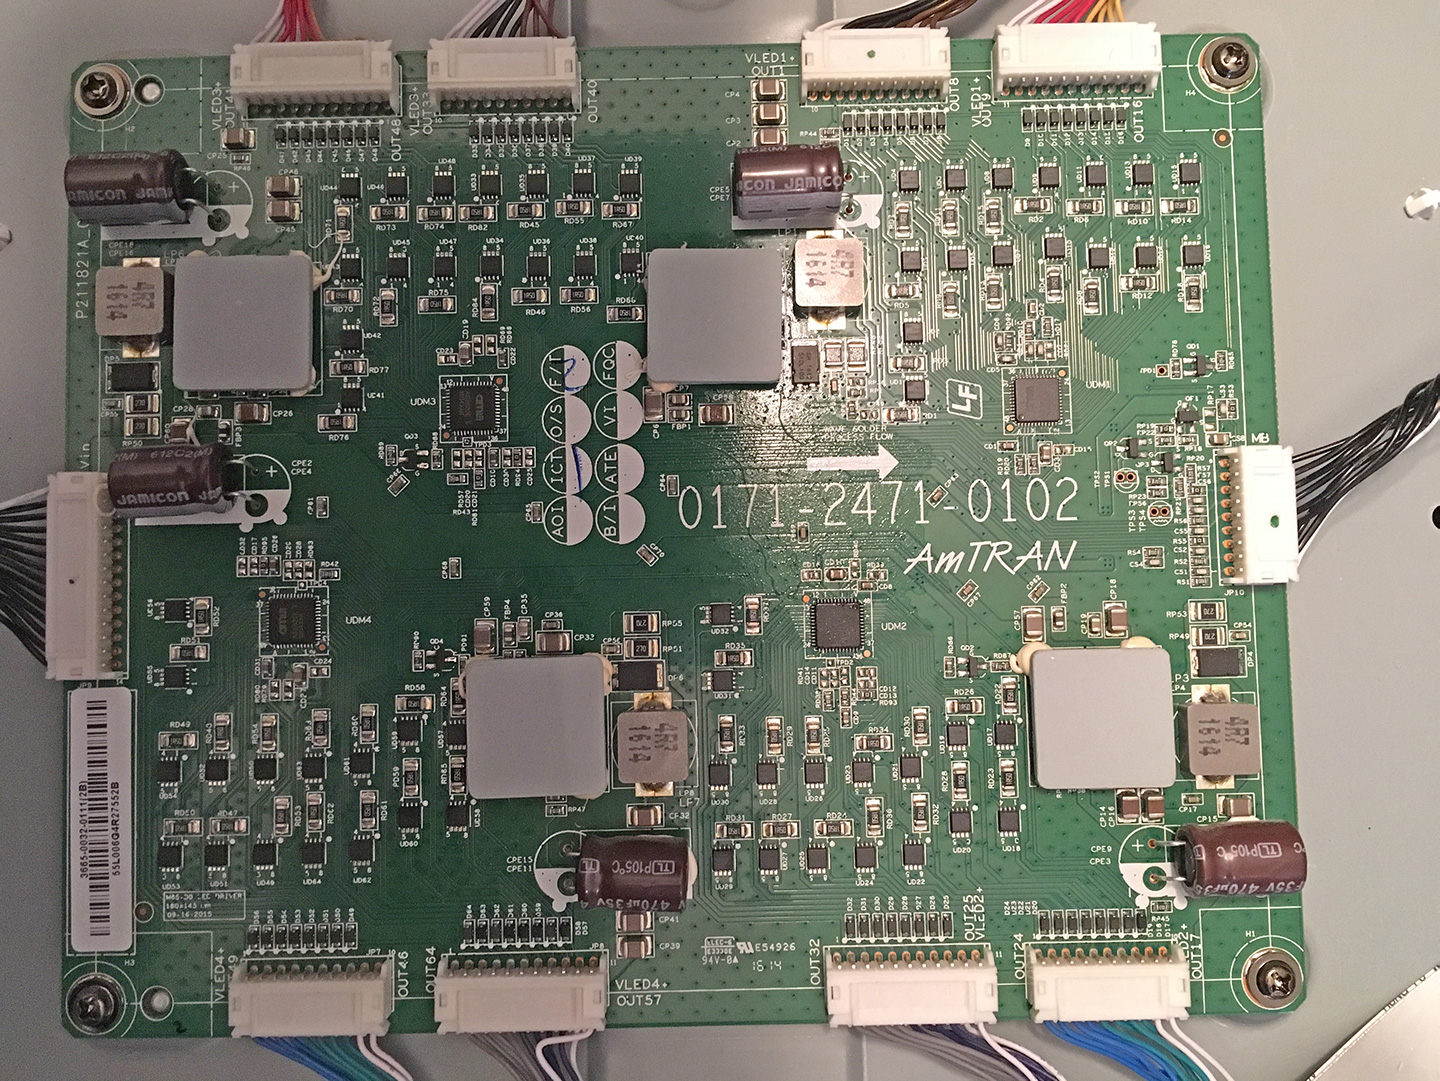
The board in the upper center of the TV is the video board. This feeds power to LED strips and tells which ones to turn on, regulates intensity, etc. This is the board you’re looking for. It’s held to the chassis with four screws and a series of wires with easy pluggable connections. On the lower left is the part number: 3665-0032-0111(2B). Notice the “2B” at the end of the number—I’ve seen a lot of place sell boards ending in “2A”. When searching for the part, both show up as compatible—but I’m not sure if they are interchangeable or what the differences are between them. I bought a replacement video board ending in “2B”.
And it’s as simple as that. Simply unplug and unscrew this board, replace it with your new one, pop the plastic back panel back on, and screw it back together. It could not be any easier. As you can see—the lower left quadrant is back up and running, and the TV works how it always did. Done and done, go about your merry way.
The rest of this video shows pain and agony of coming to this realization. If you’re curious, keep watching. It will also be helpful for those who are actually replacing their LED strips—this is the process you’ll have to go through. I stripped every part from the chassis and tested the LEDs. It was discovered that the affected LED’s would not illuminate when connected to the driver board. Upon disconnecting and testing the LED’s, they all worked. Therefore, I concluded that the LED driver board was the culprit, and I replaced it.
Once the LED driver board was replaced, all of the LED’s illuminated as they should. For $25, this fix was well worth it (even after the headache of tearing the entire TV down). If you’re experiencing the same issue, I suggest taking a chance and replacing the LED driver board straight away. It’s cheap, and much easier and less time consuming than replacing the LED’s. Again, pay attention to the uniformity of the outage—if it’s not an entire quadrant, you may have individual LED issues.


